

Routing rules
How to configure custom routing rules for your Edgee project
Nice! Your project is correctly configured and you’re ready to customize its routing rules. That means creating new backends and new routes that drive traffic to your backends.
Initially, no routes are configured and all traffic is forwarded to the default backend. Also, keep in mind that your routing settings are versioned, so you can easily keep track of changes, update your routing safely, and rollback with a couple of clicks, if needed.
How to update your routing settings
Browse to your project’s Settings panel and select Routing. Here, you need to create a new revision by cloning your existing routing settings.
Just click Clone next to the default revision.
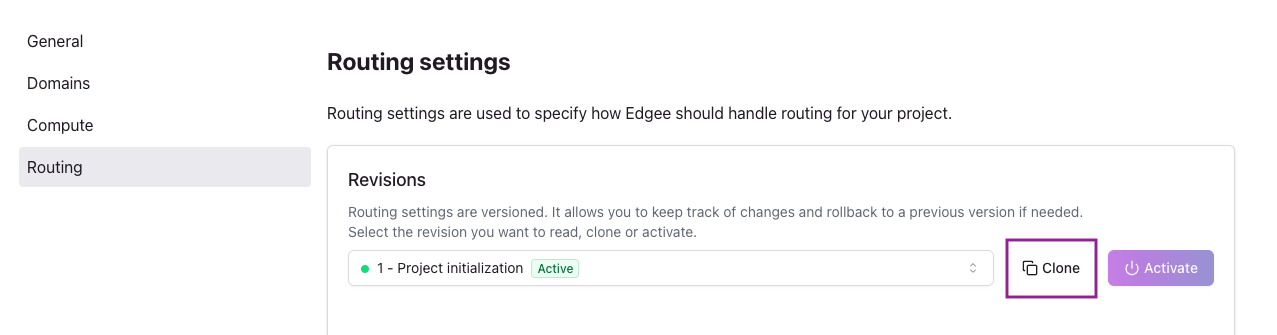

How to clone your routing settings. Click on the image to zoom in.
You can optionally describe your changes, then add a new backend and a new route.
Create a new backend
Creating a new backend is very similar to what you’ve already done when configuring your project. You need to specify the following fields:
- Name: just a string that helps you identify the new backend, unique for this project.
- Protocol: either HTTP or HTTPS (just click on the green lock to change it)
- Address: either an IP address (v4/v6) or a hostname.
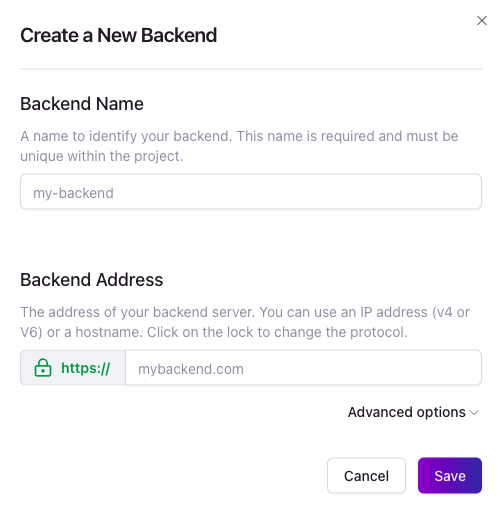
How to create a new routing backend. Click on the image to zoom in.
You could customize these advanced options as well:
- Override host: if set, will be used as he “Host” header when sending out the origin request.
- Certificate hostname: the hostname that Edgee will validate during backend connections against the certificate; if it doesn’t match, the connection will be rejected.
- SNI hostname: the Server Name Indication hostname is only required when your origin is using shared hosting, or does not have a dedicated IP address
If you don’t customize these advanced options, they will simply match the main protocol and address.
Set the default backend
Once you have more than one backend, the first one becomes your Default backend.
You can always change the default backend by clicking the menu next to your backend and select Set as default.
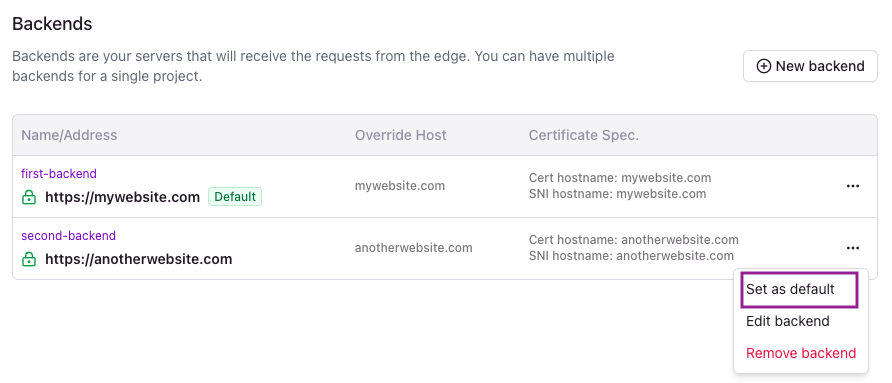
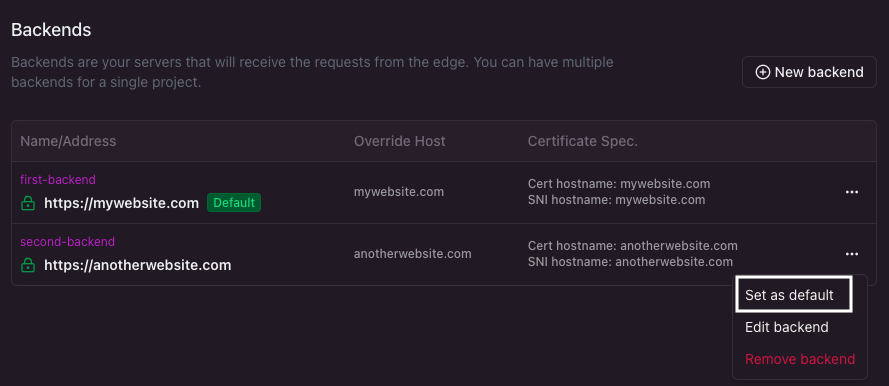
How to set your default backend. Click on the image to zoom in.
Create a new route
New projects don’t have any routes and all traffic is forwarded to the default backend.
Creating a new route allows you to direct part of the traffic to a different backend, based on the request metadata. Click New route and configure your routing rules:
- Path: either a simple URL path or a regex pattern.
- Continent: select one or more continents from the list.
- Region: select one or more regions from the list.
- Backend: select one of your backends.
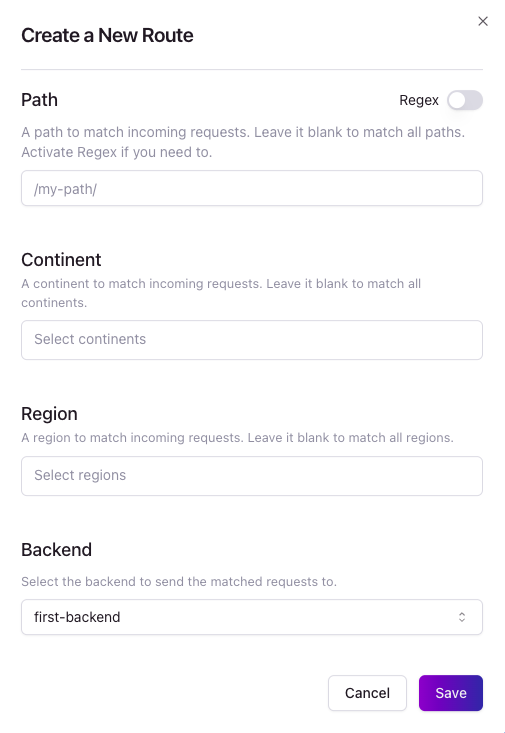

How to create a new route. Click on the image to zoom in.
The path rule is applied with an “AND” logic to all the other geo-based rules. On the other hand, the geo rules are considered with an “OR” logic as a group.
In other words, if you configure path and continent, they both need to match. While if you select a continent and a region, either one needs to match.
For example, if you configure /documentation as path and select Europe as continent, only requests with that path and
coming from within Europe will match this route. If a request comes from Europe but for a different path, it won’t match.
As an additional example, if you select North America as continent and EU-West as region, all requests from within
North America or Western Europe will match this route.
Note: by default, if you leave a rule empty, it won’t be applied. For example, if you don’t select any Continent, this route will match all continents.
Activate your new revision
Once you’re done configuring backends and routes, it’s time to save the revision. Click Save at the bottom of the page.
This will bring you back to your Routing settings, where you can select any existing revision and review its configuration.
When you’re ready to start using the new revision, just select it and click Activate.
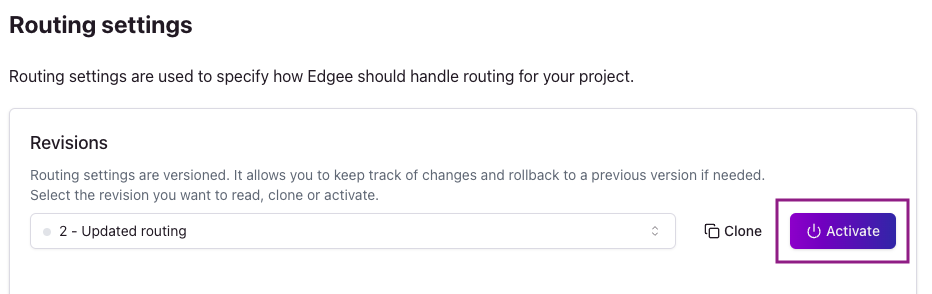
How to activate your new settings. Click on the image to zoom in.
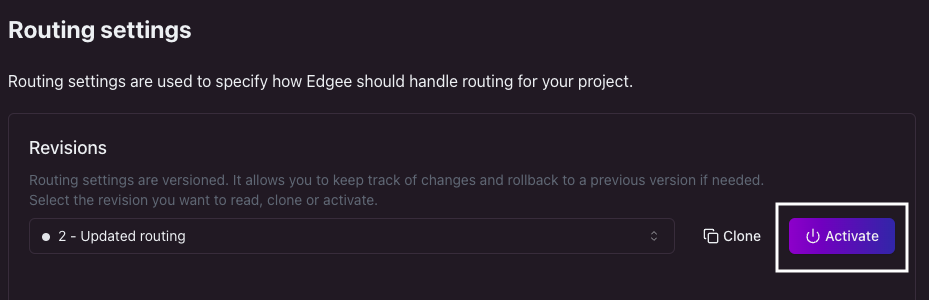
Note: nothing happens until you activate the new revision you’ve just created. This mechanism allows you to easily and quickly compare and switch between different configurations without facing any downtime or configuration issues.
Don’t forget to activate your new revision!